Lemon Chicken Skewers

_dsc8374

Today’s dish is a super simple and easy one. It is a product of being basically broke and wanting to eat healthier. I don’t think I realized that when I started all this, how expensive eating healthy can be. These skewers don’t require a lot of time, money, or preparation though, which is definitely a plus. You can make them if you are in a pinch, like me, and have little money AND little time to cook anymore. I find myself coming home from work super late and exhausted – making the prospect of cooking a daunting task. Fear not, just prep these the night before and pop em on the grill/grill pan and you are ready to go!

Ingredients

  • 2 chicken breasts, cut into large cubes
  • Ground pepper
  • Salt
  • 1 garlic clove, minced (or garlic powder)
  • Parsley, finely minced
  • 1 large lemon, juiced
  • Spinach
  • Cherry tomatoes

Directions

  • Season the chicken cubes with pepper, salt, garlic, and parsley
  • Place in a bag with lemon juice for 1 hour – overnight
  • Place chicken cubes on a skewer and grill until cooked
  • At the same time, lightly wilt some spinach with EVOO in a pan and add the cherry tomatoes and cook for a few minutes
  • Place the skewers over the bed of spinach and tomatoes and enjoy your gluten free, high protein meal!

_dsc8368

Advertisement

Mini Beef Wellingtons

_DSC8189

Hi everyone. Today I bring to you beef wellingtons, kind of. You see, the idea of a beef wellington (filet wrapped in pastry dough) is basically all kinds of amazing. I mean what’s not to like? Meat and pastries. So I have always thought about making beef wellingtons because they are so good, but the problem I always run into is that I don’t like mushrooms….like at all. They are some of my least favorite foods and are a key ingredient in this dish. Also, I didn’t want to make big ones as a main dish. Not sure why, but I was feeling the appetizer route. That led me to this recipe, which still included mushrooms, but I decided to change those out. I replaced the mushrooms with grilled onions and they turned out amazing. Obviously if you are a traditionalist, or a mushroom lover, go for the original, but the onions as a substitute worked just as well in my opinion.

_DSC8181

Ingredients:

  • 1 tablespoon extra virgin olive oil
  • 1 yellow onion, thinly sliced
  • 1 teaspoon finely chopped fresh rosemary (can use dried)
  • 1/4 teaspoon freshly ground black pepper
  • Sea salt
  • 1 large egg, lightly beaten
  • 1 16oz package frozen puff pastry dough, thawed
  • 1 lb trimmed beef tenderloin, cut into 24 cubes (about 3/4 inch each)
  • 1/3 cup Boursin cheese (I found a Boursin cheese with herbs at the market)

Directions

  • In a skillet over medium heat, sauté onions (or mushrooms) with rosemary, salt and pepper until cooked
  • Roll puff pastry out and cut into 3 in. squares (mine ended up being more triangles due to the way the dough was shaped)
  • Place one beef cube in the middle of the pastry square and add a pinch of salt
  • Top each cube with some cheese and some onions (or mushrooms)
  • Brush the edges of the square with egg wash and fold the dough over the cube to seal it
  • After you’ve completed this with all of the cubes, place them on a parchment lined baking sheet and brush the tops with the egg wash (I found it easier to just dunk and roll them in the egg wash)
  • Bake for ~9 minutes at 450 degrees, until the pastry is golden brown
  • Let sit for ~5 minutes and serve!

_DSC8183

Tropical Chili Shrimp Appetizer

_DSC6243

So the other day I decided to make a light appetizer using some shrimp I had, but wasn’t enough for a meal.  This is a recipe that I made up as a conglomerate of some other recipes I saw while flipping through a magazine and thought I would try and combine aspects of each that I thought would be interesting. It turned out pretty good and refreshing, which is not something I would normally say about a shrimp dish, but it really was. It is also super easy and takes very little work to put together and only 1 pan, which is always a plus.  Try it out and let me know how it goes!

_DSC6236

Recipe:

  • 8 oz shrimp
  • 1 tbsp chili powder
  • 1 clove garlic, minced
  • Salt
  • Pepper
  • Pinch of red chili flakes
  • Juice of 1 lime/lemon
  • 1 Mango, cubed
  • 1 Avocado, cubed
  • toothpicks

Instructions

  • Wash and pat dry the shrimp
  • In a bowl, mix the shrimp with chili powder, salt, pepper, a pinch of red chili flakes, and garlic
  • In a pan over medium heat, cook the shrimp until they turn orange/pink, and add the lime juice as you cook
  • Remove them from the pan and using a toothpick, stick a shrimp on top of 1 mango cube and 1 avocado cube

_DSC6242

Classic Grilled Cheese Sandwich

_DSC6187

So I decided to try a Meatless Monday thing and made a classic grilled cheese sandwich, that I paired with a tomato bisque soup and basic salad with balsamic vinaigrette.  Who doesn’t love a good grilled cheese sandwich?  There is just something nostalgic and comforting about it.  But in the past and growing up, I always made it with slices of American cheese. Now don’t get me wrong, I actually love American cheese and think its delicious, although others might feel that it’s too processed, which I can understand.  This time, I tried to be slightly more sophisticated and used parmesan and mild cheddar cheese.  I read somewhere that it is better to use 2 different types, with one being saltier (parmesan). So I kinda went with it, and actually it turned out pretty good. Although, I don’t think you can eff up a grilled cheese unless you burn it super bad, but even then, there’s a market for that.

_DSC6179

Ingredients:

  • Bread (whatever kind, I just used regular good old fashioned white bread)
  • 1/2 tbsp butter
  • 1/2 cup shredded cheddar cheese
  • 1/4 cup shredded parmesan cheese

Directions:

  • In a small mixing bowl, toss the 2 types of cheeses together and blend them together
  • In a skillet over medium heat, melt 1/4 tbsp of butter and add the slices of bread
  • When slightly toasted, flip the bread and add the cheese blend to both slices
  • When the cheese begins to melt, flip one slice on top of the other
  • After a few minutes, flip the sandwich to finish melting the cheese and toasting the other slice of bread
  • Cut and enjoy like your inner kid wants to

_DSC6181

Crab Cups

_DSC5819

I know that I said that I would get back to doing this now that my life has settled down again, but for some reason, I just haven’t. Well, I am going to say it again and hope it sticks this time.  I recently made a crab appetizer that I have done a few times now with the help of Jenn.  It was really her idea about a year ago to make these for a dinner party, but we ate them without taking pictures, so there’s no record of that.  Coincidentally, I also made them for a dinner party this go around and took pics for good measure.  Now, they aren’t the greatest pictures (and there is no plating) as I was running late to the party (fashionably late of course). We originally got the recipe from here.  And each time, I tweaked it a little to fit my needs better.  They are definitely easy to make and so far, both dinner parties enjoyed them a lot.  My colleague actually just asked me for the recipe.

_DSC5805

Ingredients:

  • 1 pkg of flour tortillas, cut into drinking glass rim-sized circles
  • 1 8oz pkg soft cream cheese
  • 2 (6 ounce) can crab meat, drained (original recipe calls for 1, but c’mon…)
  • 2 tablespoons mayonnaise
  • 2 tablespoons grated Parmesan cheese
  • 1/2 cup shredded Cheddar cheese
  • 2 tablespoons thinly sliced green onion
  • 1 teaspoon Worcestershire sauce
  • 1 pinch paprika

_DSC5811

Directions:

  • *this is where I made some tweaks* The original recipe called for biscuit dough, which I have tried and it just turned out too doughy and took away from the whole dish.  This time I tried little circles of flour tortillas, which turned out to be a lot better
  • Brush the tortilla circles with a little bit of melter butter or olive oil and press into a muffin/cupcake pan
  • Bake the tortillas at 375 degrees for ~10 min or until golden brown and crispy
  • At the same time, mix the cream cheese, crab meat, mayo, parmesan, cheddar cheese, green onion, and Worcestershire sauce in a mixing bowl
  • Place a spoonful of the mixture into each tortilla bowl (still in the muffin pan) and garnish with a dash of paprika
  • Bake at 375 degrees for ~15-18 minutes
  • Take them out and enjoy with some friends/impress some coworkers

_DSC5815

Stuffed Bell Peppers

DSC_0029

So the other day I decided to try something that a year ago I would never have done – a stuffed bell pepper.  1) because I never stuffed anything before and 2) I never really ate whole bell peppers – just wasn’t my thing.  I can’t even tell you what got me thinking to do this, I just decided to I guess…weird.  It was a simple meal with limited ingredients and turned out decently.  It could also be an appetizer now that I think about it. Could have probably used more cheese and salt though.

Ingredients

  • Large bell peppers, halved
  • 1 lb ground pork
  • 2 cups cooked rice (brown/white/your choice)
  • Shredded cheese of your choice (amount of choice too)
  • Salt and pepper
  • Paprika

DSC_0031

Instructions

  • In a large sauté pan, add a little oil and cook the ground pork
  • Salt and pepper generously and continue to cook
  • Add the cooked rice into the pan and continue to mix and cook (you don’t have to add all the rice, your choice)
  • Add more salt and pepper as needed
  • Place the bell pepper halves on a large baking sheet
  • Fill the halves with the pork/rice mix to desired fill
  • Top with as much cheese as you want
  • Bake at 375 degrees for approximately 10-15 minutes
  • Top with a dash of paprika, and then eat it, duh

DSC_0040

Carne Asada Tacos

DSC_0008

I don’t know about you, but I love me some Mexican food – tacos, burritos, tortas, I’ll eat them all.  But tacos (like those $1 ones you get from a cart) have a special place in my heart.  With that being said, I decided to try my hand at making some carne asada tacos (turns out its more expensive to make than to buy probably).  They actually turned out pretty good though.

Ingredients for asada:

  • 1 lb skirt steak (I cut them into pieces that would fit on my grill)
  • 2 oranges, juiced
  • 2 limes, juiced
  • 1 handful finely chopped cilantro
  • 1/2 serrano chile, finely chopped
  • 4 garlic cloves, minced
  • 2 tbsp vinegar
  • salt and pepper

Ingredients for salsa

  • 4 ripe tomatoes
  • 1 serrano chile
  • 1 lime
  • 1/2 white onion
  • handful of cilantro
  • salt

DSC_0018

Other ingredients:

  • tortillas
  • white onion, chopped
  • cilantro, chopped

Directions:

  • Mix all the ingredients in a large ziplock bag and let it marinate for ~30-45 minutes
  • On an oiled grill over medium heat, cook the steak until your desired doneness (I like med-med rare)
  • let rest for 10 minutes, then cut into slices
  • Meanwhile, put the ingredients for the salsa in a food processor and pulse until liquidy
  • Heat the tortillas in a slightly oiled pan, place the meat slices on the tortilla
  • top with chopped onions, cilantro, and salsa and enjoy!

DSC_0009

Picnic Broccoli Salad

_DSC5679

At the request of the ladies in my life to eat healthier, I have been making more salads than ever before. When they asked, my first thought was boring! Then I requested if mac salad, potato salad, and pasta salads count, but apparently they do not. Thus, today is a broccoli salad, complete with mayo, bacon, and cheese…yummm healthy….Actually, it’s not unhealthy and its pretty good too. I mean you can always make it unhealthy by adding as much crap as you want into it, but I kept it pretty simple.

Ingredients

  • 3 heads of broccoli, florets chopped into eatable pieces
  • 1 cup mayo
  • juice of 1/2 lemon
  • 2 tbsp apple cider vinegar
  • 1/4 cup sugar
  • salt and pepper
  • 6+ strips of bacon (up to you)
  • 1/2 red onion, chopped
  • Halved grape tomatoes
  • Shredded cheddar cheese (as much as you desire)
  • Chopped nuts (I used walnuts)
My bacon is happy

My bacon is happy

Directions

  • Blanch the broccoli florets in a pot of boiling water, drain and set aside
  • Mix the mayo, lemon juice, vinegar, sugar in a bowl
  • Salt and pepper to taste
  • Meanwhile, fry the bacon until crispy, dab with paper towel to get excess oil off
  • Chop the bacon
  • Add the bacon, onions, tomatoes, nuts, and cheese to the broccoli and mix well in a large bowl
  • Add the sauce and mix thoroughly (use enough to coat well, but you don’t need to use all of it)
  • Let sit in the refrigerator for at least 30 min
  • Serve and enjoy

_DSC5682

Seared Tuna with Asian Vinaigrette Salad

_DSC5647

My uncle loves to go deep sea fishing, and recently went out for tuna. He caught some yellowtail and some yellowfin. Every time he goes I always ask for some, and this time, he delivered! Tuna is pretty expensive to buy, so getting it fresh for free is pretty awesome. I seared the tuna and served it over a salad with an asian vinaigrette. The salad was made from a spring mix and napa cabbage cut into strips like a slaw.

Ingredients

  • Tuna loin
  • Spring salad mix
  • Napa cabbage
  • Grape tomatoes
  • 1/2 red onion
  • 1/4 cup rice wine vinegar
  • 1/4 cup sugar
  • 1 tbsp soy sauce
  • 1/2 lime, juiced
  • 1 tsp grated ginger
  • Some chopped cilantro
  • 1/2 cup canola oil
  • 1 tbsp sesame oil
  • Salt and freshly ground pepper

_DSC5644

Directions for tuna and salad

  • Rinse the tuna and pat dry with paper towels
  • Grind black peppercorns onto a plate and roll the tuna loin in the pepper
  • Pour a little canola oil into a pan on high heat
  • Sear the tuna for a few seconds on each side, place on a plate and put it in the freezer for a few minutes to stop the cooking process
  • Cut the napa cabbage into strips, halve the tomatoes, and thinly slice the red onion

Directions for vinaigrette

  • Heat the vinegar in a small saucepan over medium heat, then mix the sugar in until it dissolves
  • Combine the oil, soy sauce, lime juice, sesame oil, ginger, and cilantro
  • Pour in the vinegar and sugar mix
  • Mix the dressing and chill in the refrigerator for ~20 minutes

Slice the tuna into ~ 1/4 inch slices and serve over the salad. This was my first time making an asian vinaigrette, and I really liked it. I was getting tired of balsamic dressings, so this was a nice alternative. The napa also added a different flavor and textural element which was nice. Overall, the salad was really good and I used the leftover dressing again the next day. And then there’s the tuna, which is always delicious. Hope you enjoy!

_DSC5650

Chili and Cast Iron Corn Bread

_DSC5601

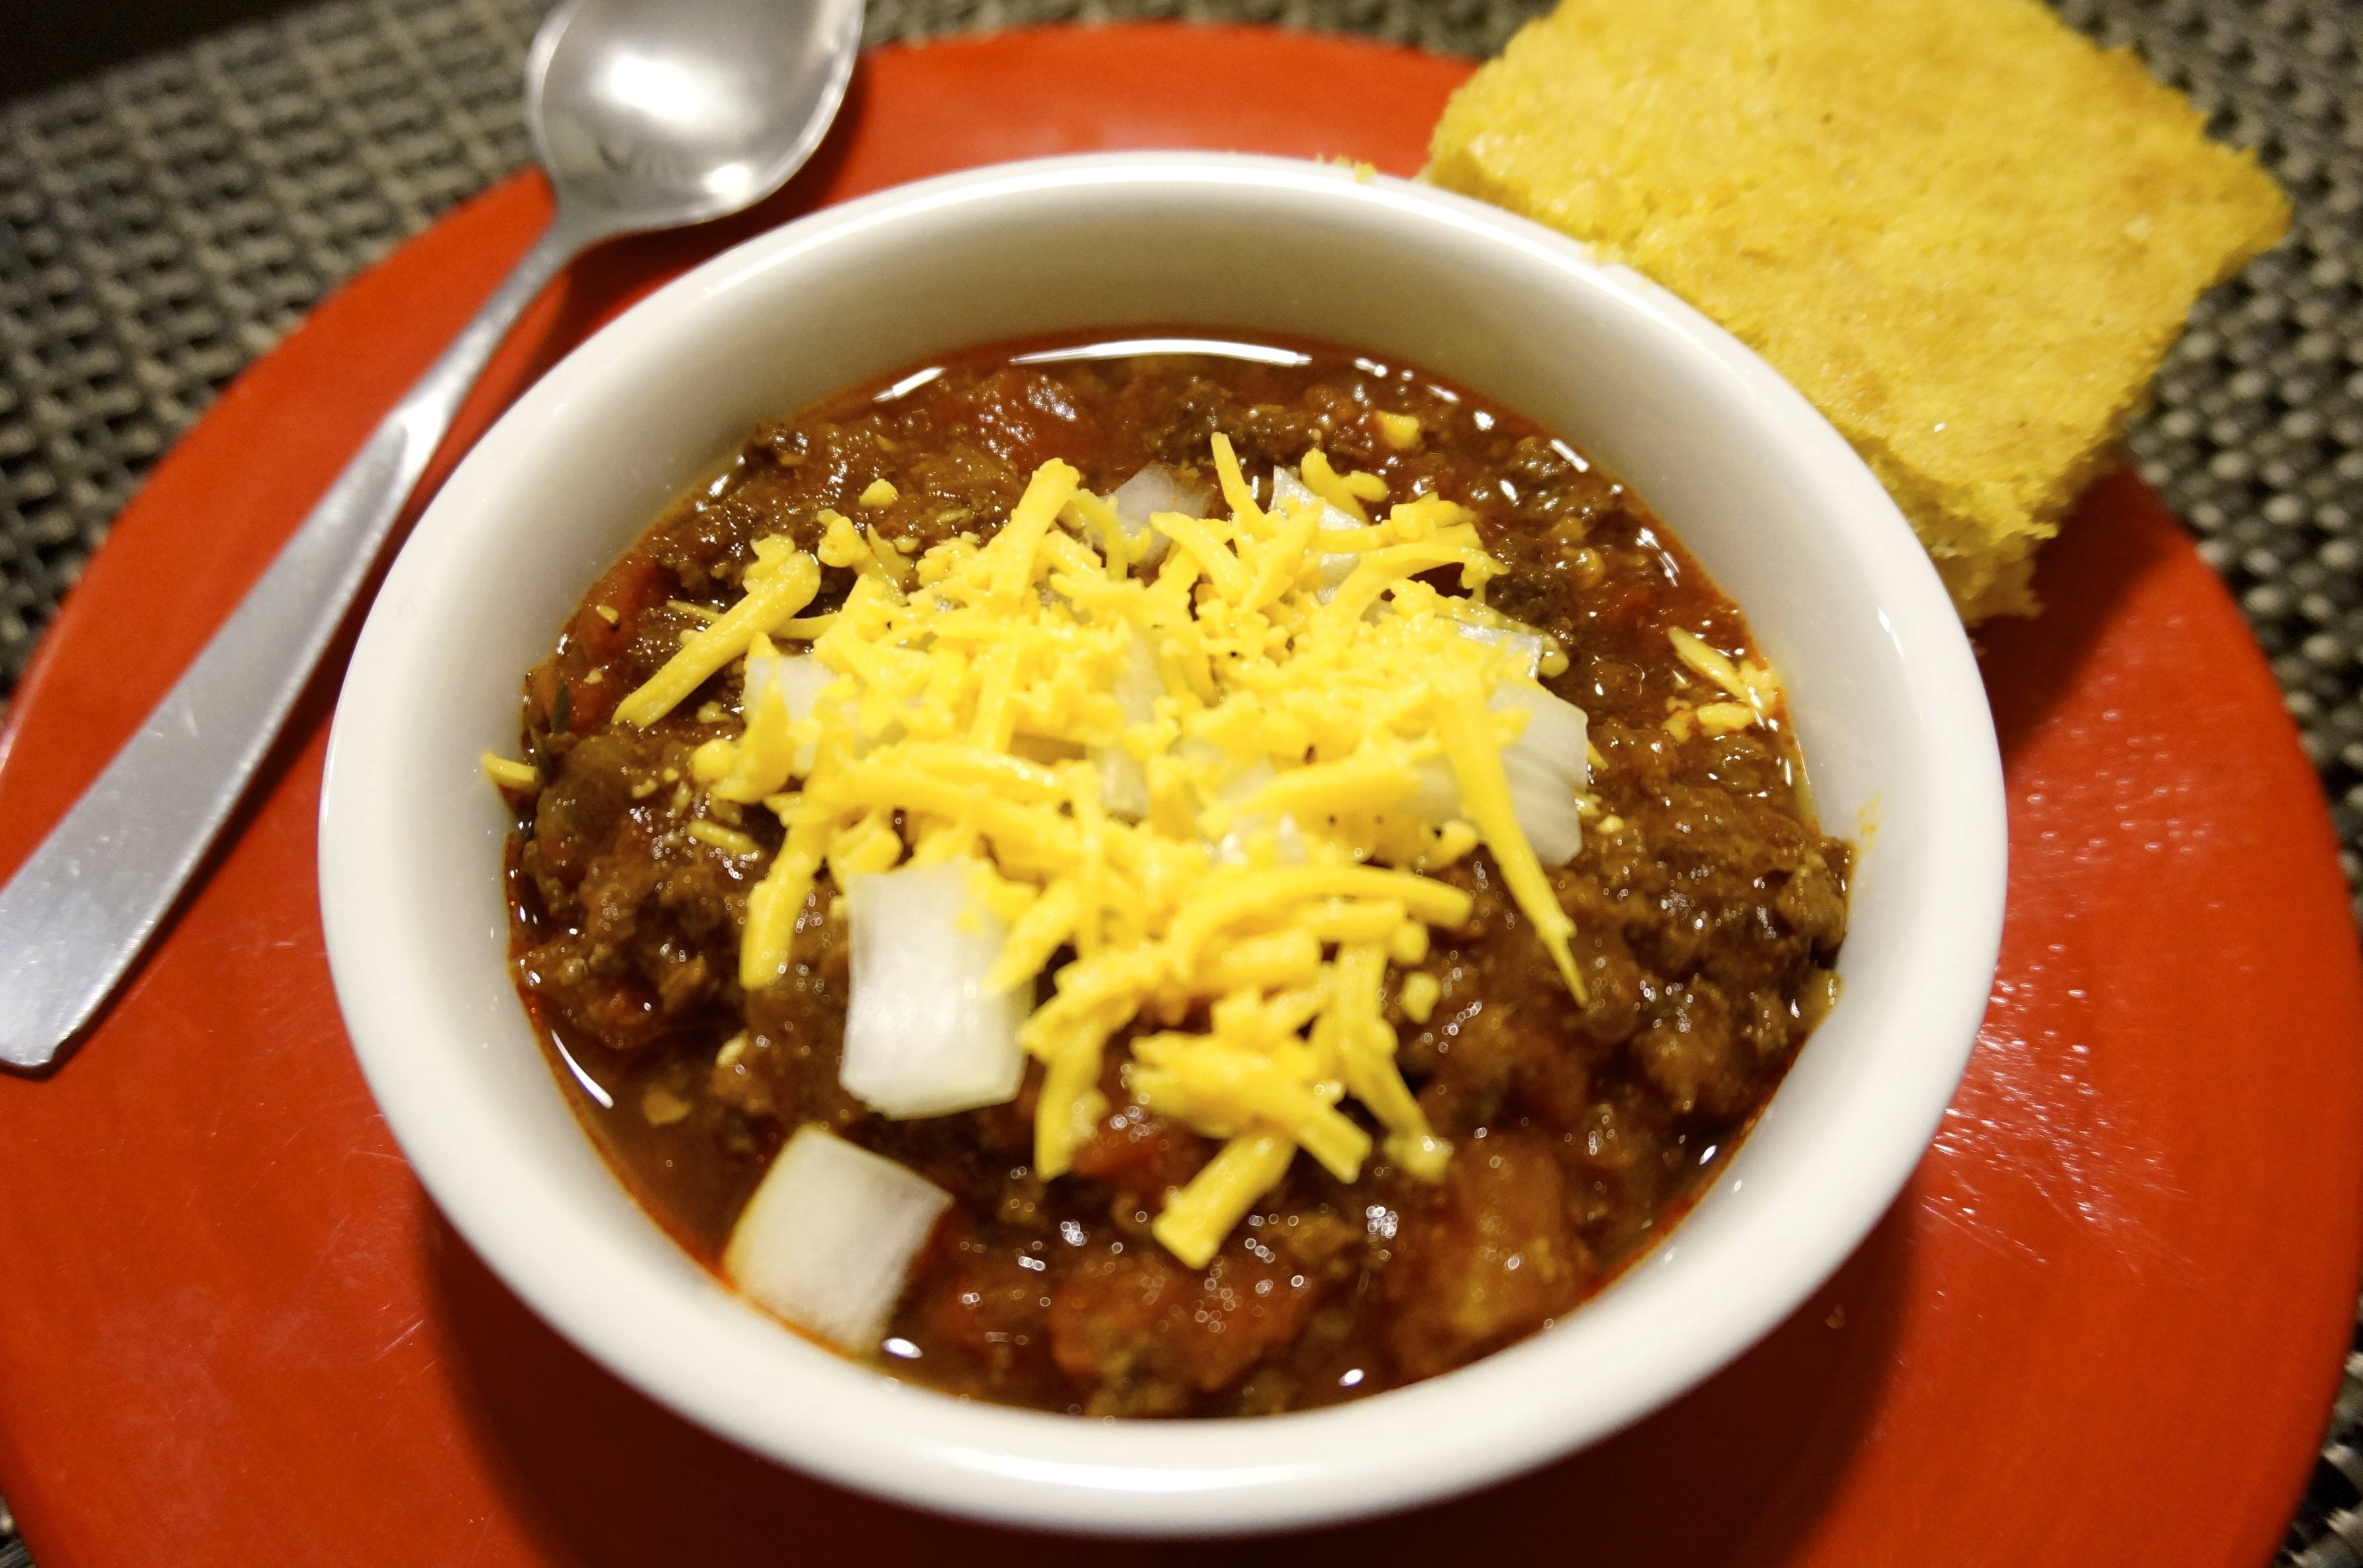
We had the slow cooker out from making the hummus and decided to use it again to make chili. What goes well with chili? Cornbread of course! Corn bread made in a cast iron skillet to be exact. So we put everything in the crock pot before going to work and came home to an apartment filled with the smell of chili, and in no way was that disappointing. Then we whipped up the cornbread and ate a terribly unhealthy, but terribly delicious meal. Got the recipe for the cornbread from here.

_DSC5572

Ingredients for chili (semi made up from a hodgepodge of other recipes Ive seen in the past)

  • 2 lbs ground beef
  • 2 yellow onions, diced
  • 5 cloves of garlic, minced
  • 1/4 cup chili powder
  • 2 tsp kosher salt
  • dash of pepper
  • 3 cans of stewed/diced tomatoes
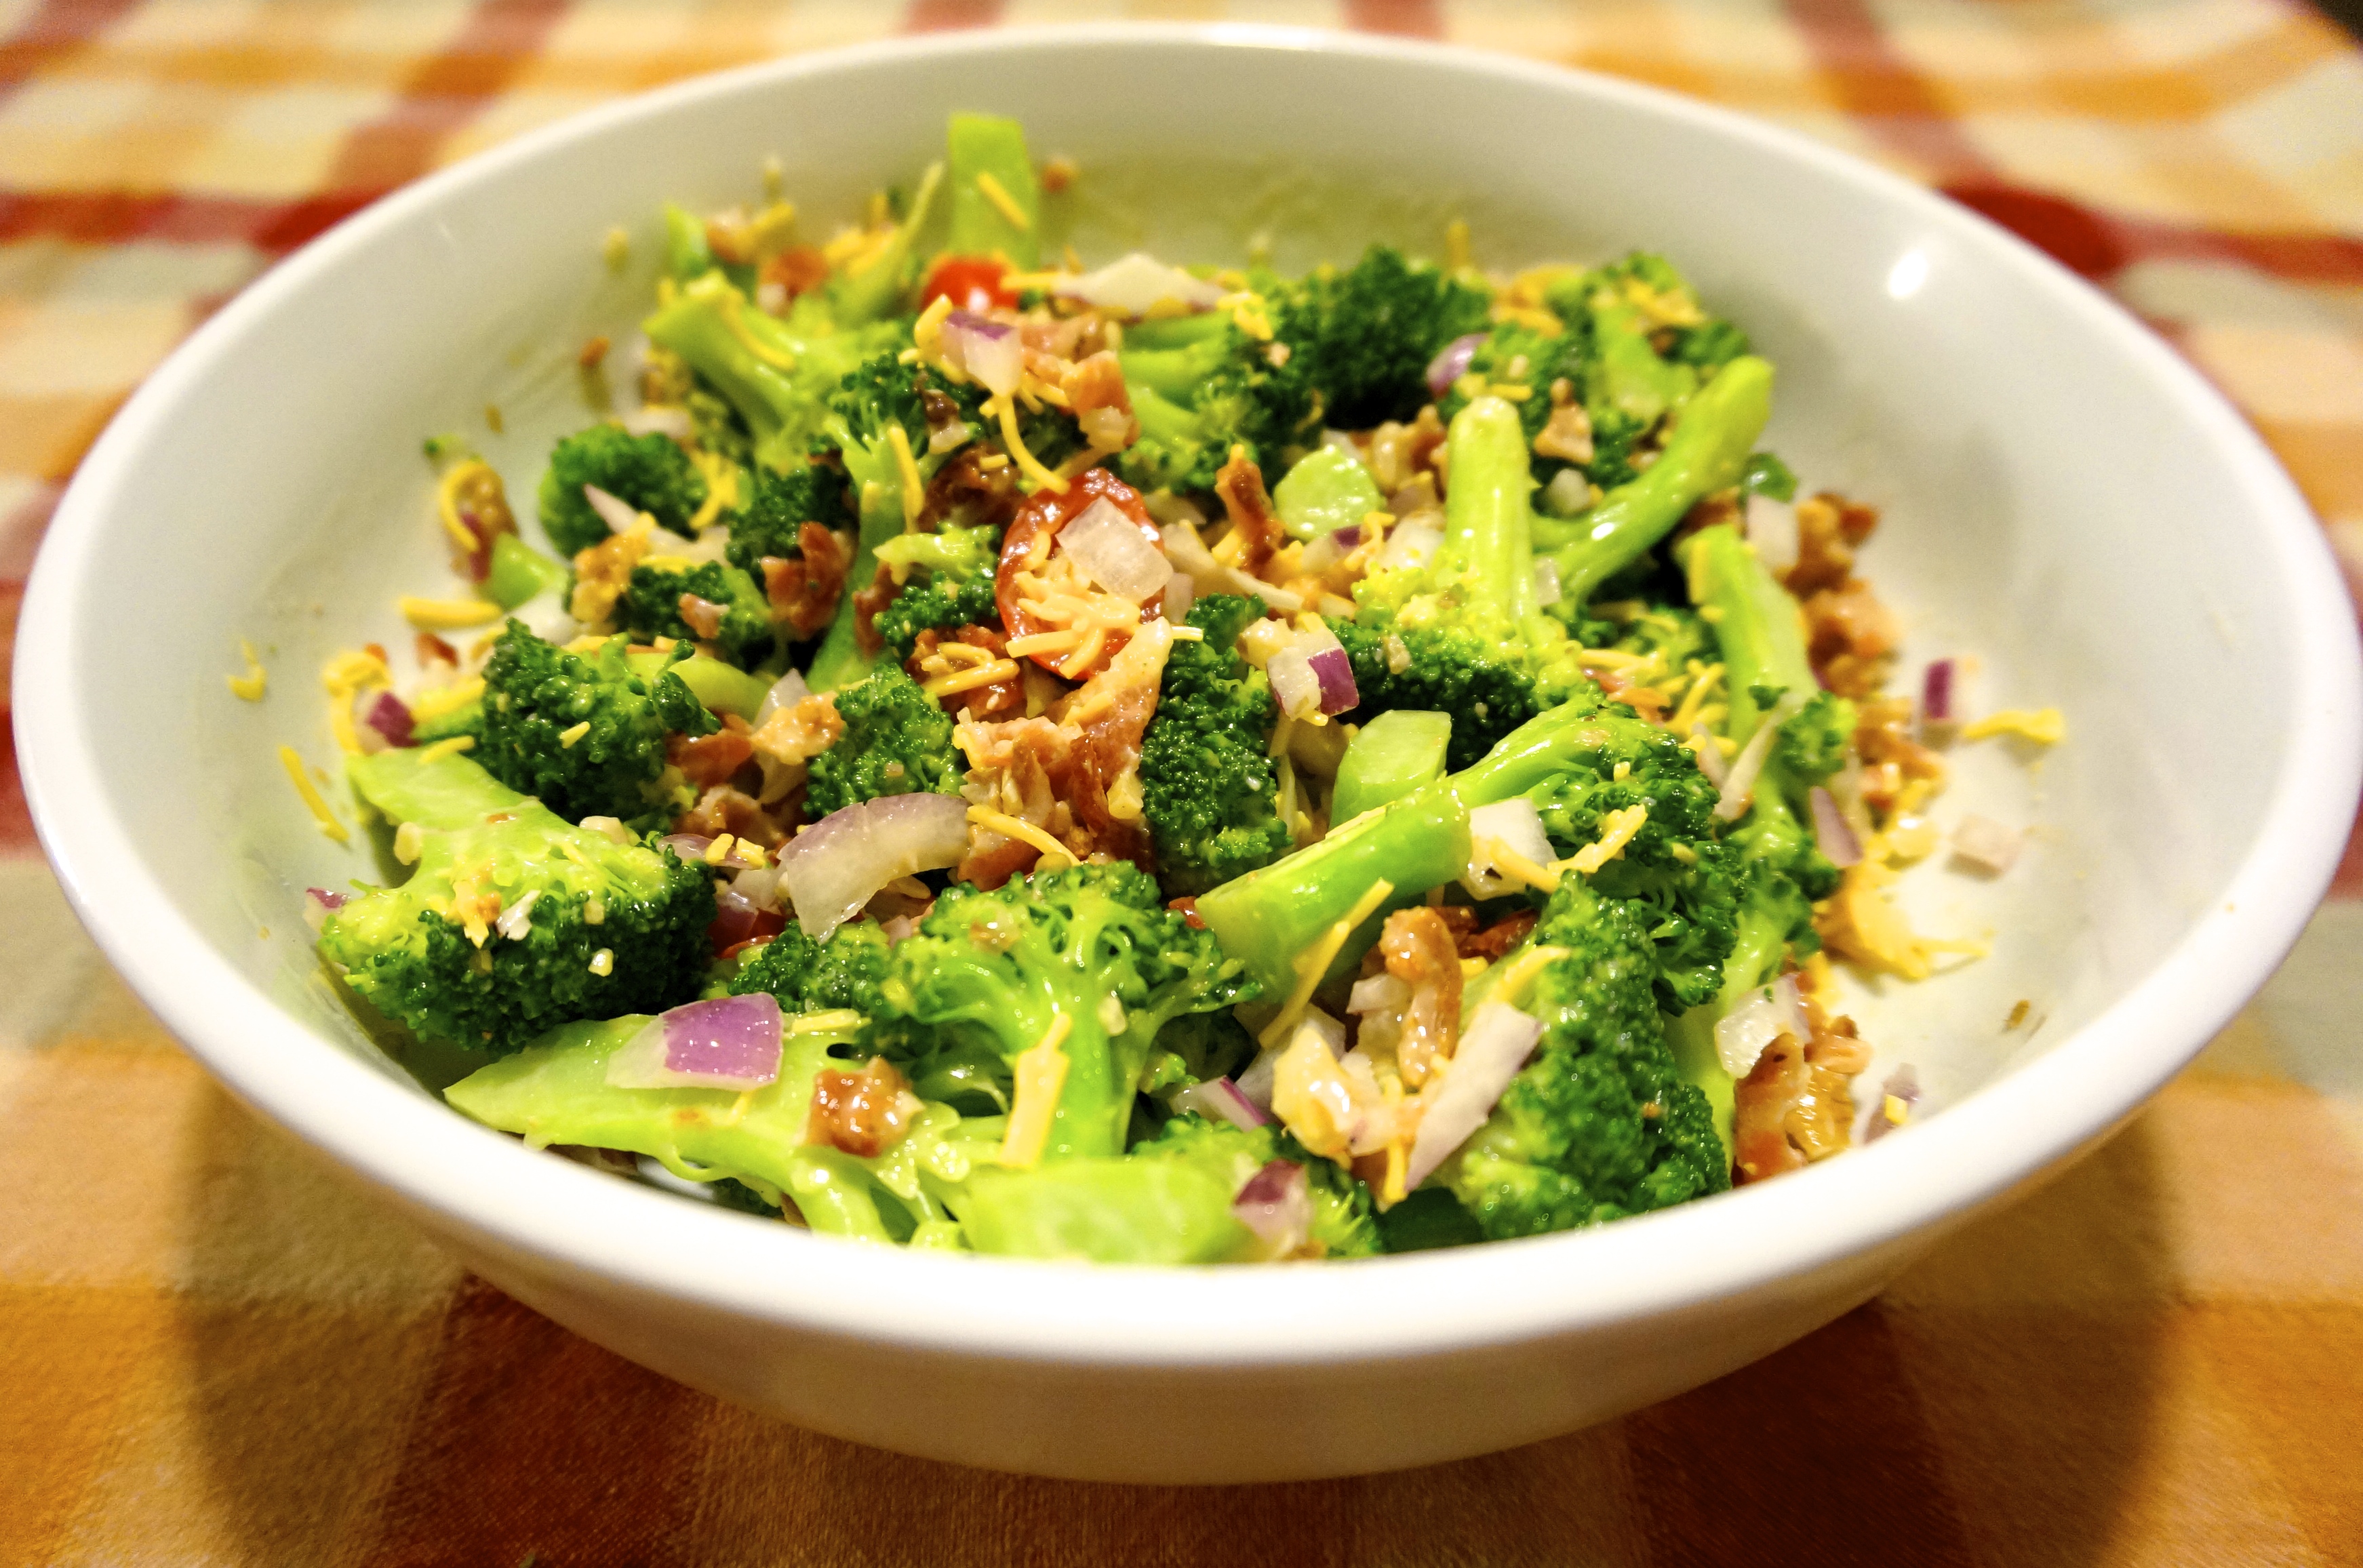
  • Shredded cheddar cheese and chopped onions for serving

Directions

  • In a large pan on medium heat, cook the onions and season with salt until soft
  • Add the garlic and chili powder and stir for a minute
  • Add the beef and cook until brown
  • Drain the majority to almost all of the oil and transfer to a slow cooker
  • Cook the chili in the slow cooker on low for 8 hours

_DSC5566

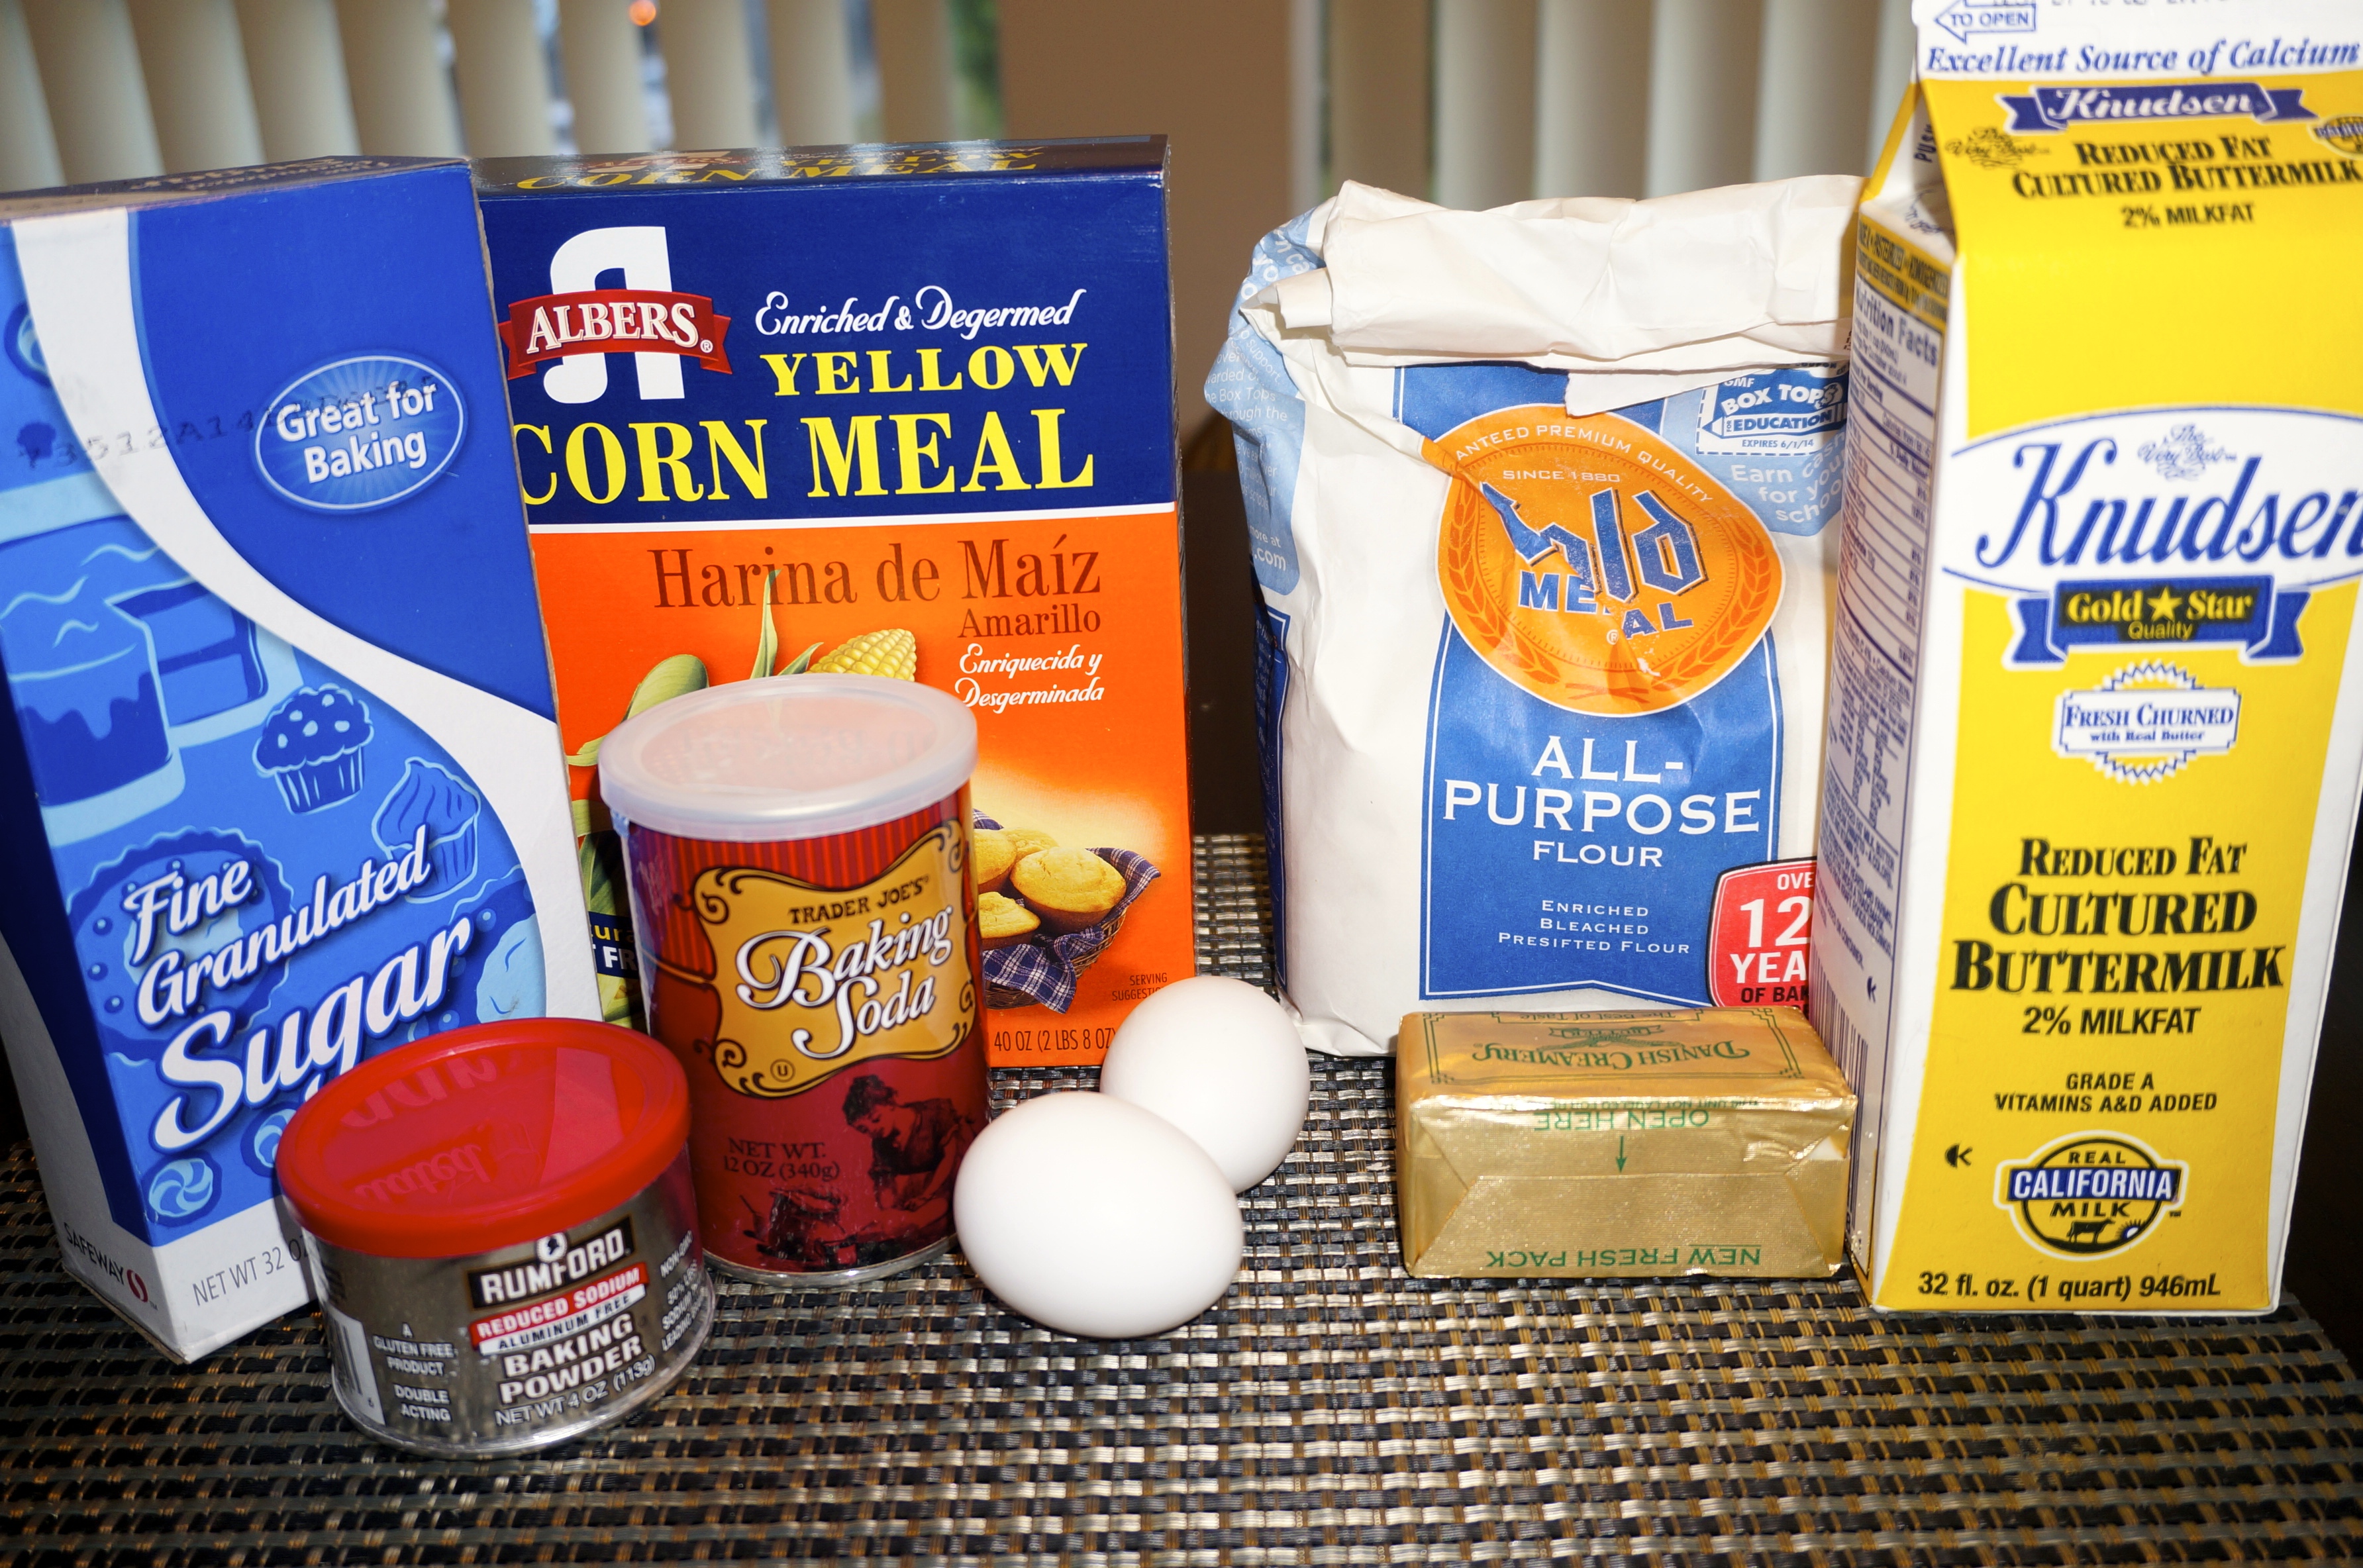
Ingredients for corn bread

  • 8 tbsp unsalted butter
  • 1 1/4 cups finely ground yellow cornmeal
  • 3/4 cup all-purpose flour
  • 2 tbsp granulated sugar
  • 1 tsp baking powder
  • 1 tsp baking soda
  • 1 tsp fine salt
  • 2 large eggs
  • 1 1/2 cups buttermilk

_DSC5574

Directions for corn bread

  • Heat oven to 450 degrees
  • put 2 tbsp butter in a cast iron skillet and set aside, melt the other 6 tbsp of butter in a small dish
  • Whisk cornmeal, flour, sugar, baking powder, baking soda, and salt in a large bowl
  • Whisk eggs in a large bowl until frothy, then mix in the buttermilk
  • Pour egg mix into the flour/cornmeal mix and stir until dry streaks are incorporated (easier if you use a rubber spatula), but careful not to overmix
  • Fold in the melted butter and let stand for 5 minutes
  • When the oven is hot, place the skillet with the 2 tbsp butter in for 5 minutes
  • Remove the pan and coat the bottom of the pan with the melted butter
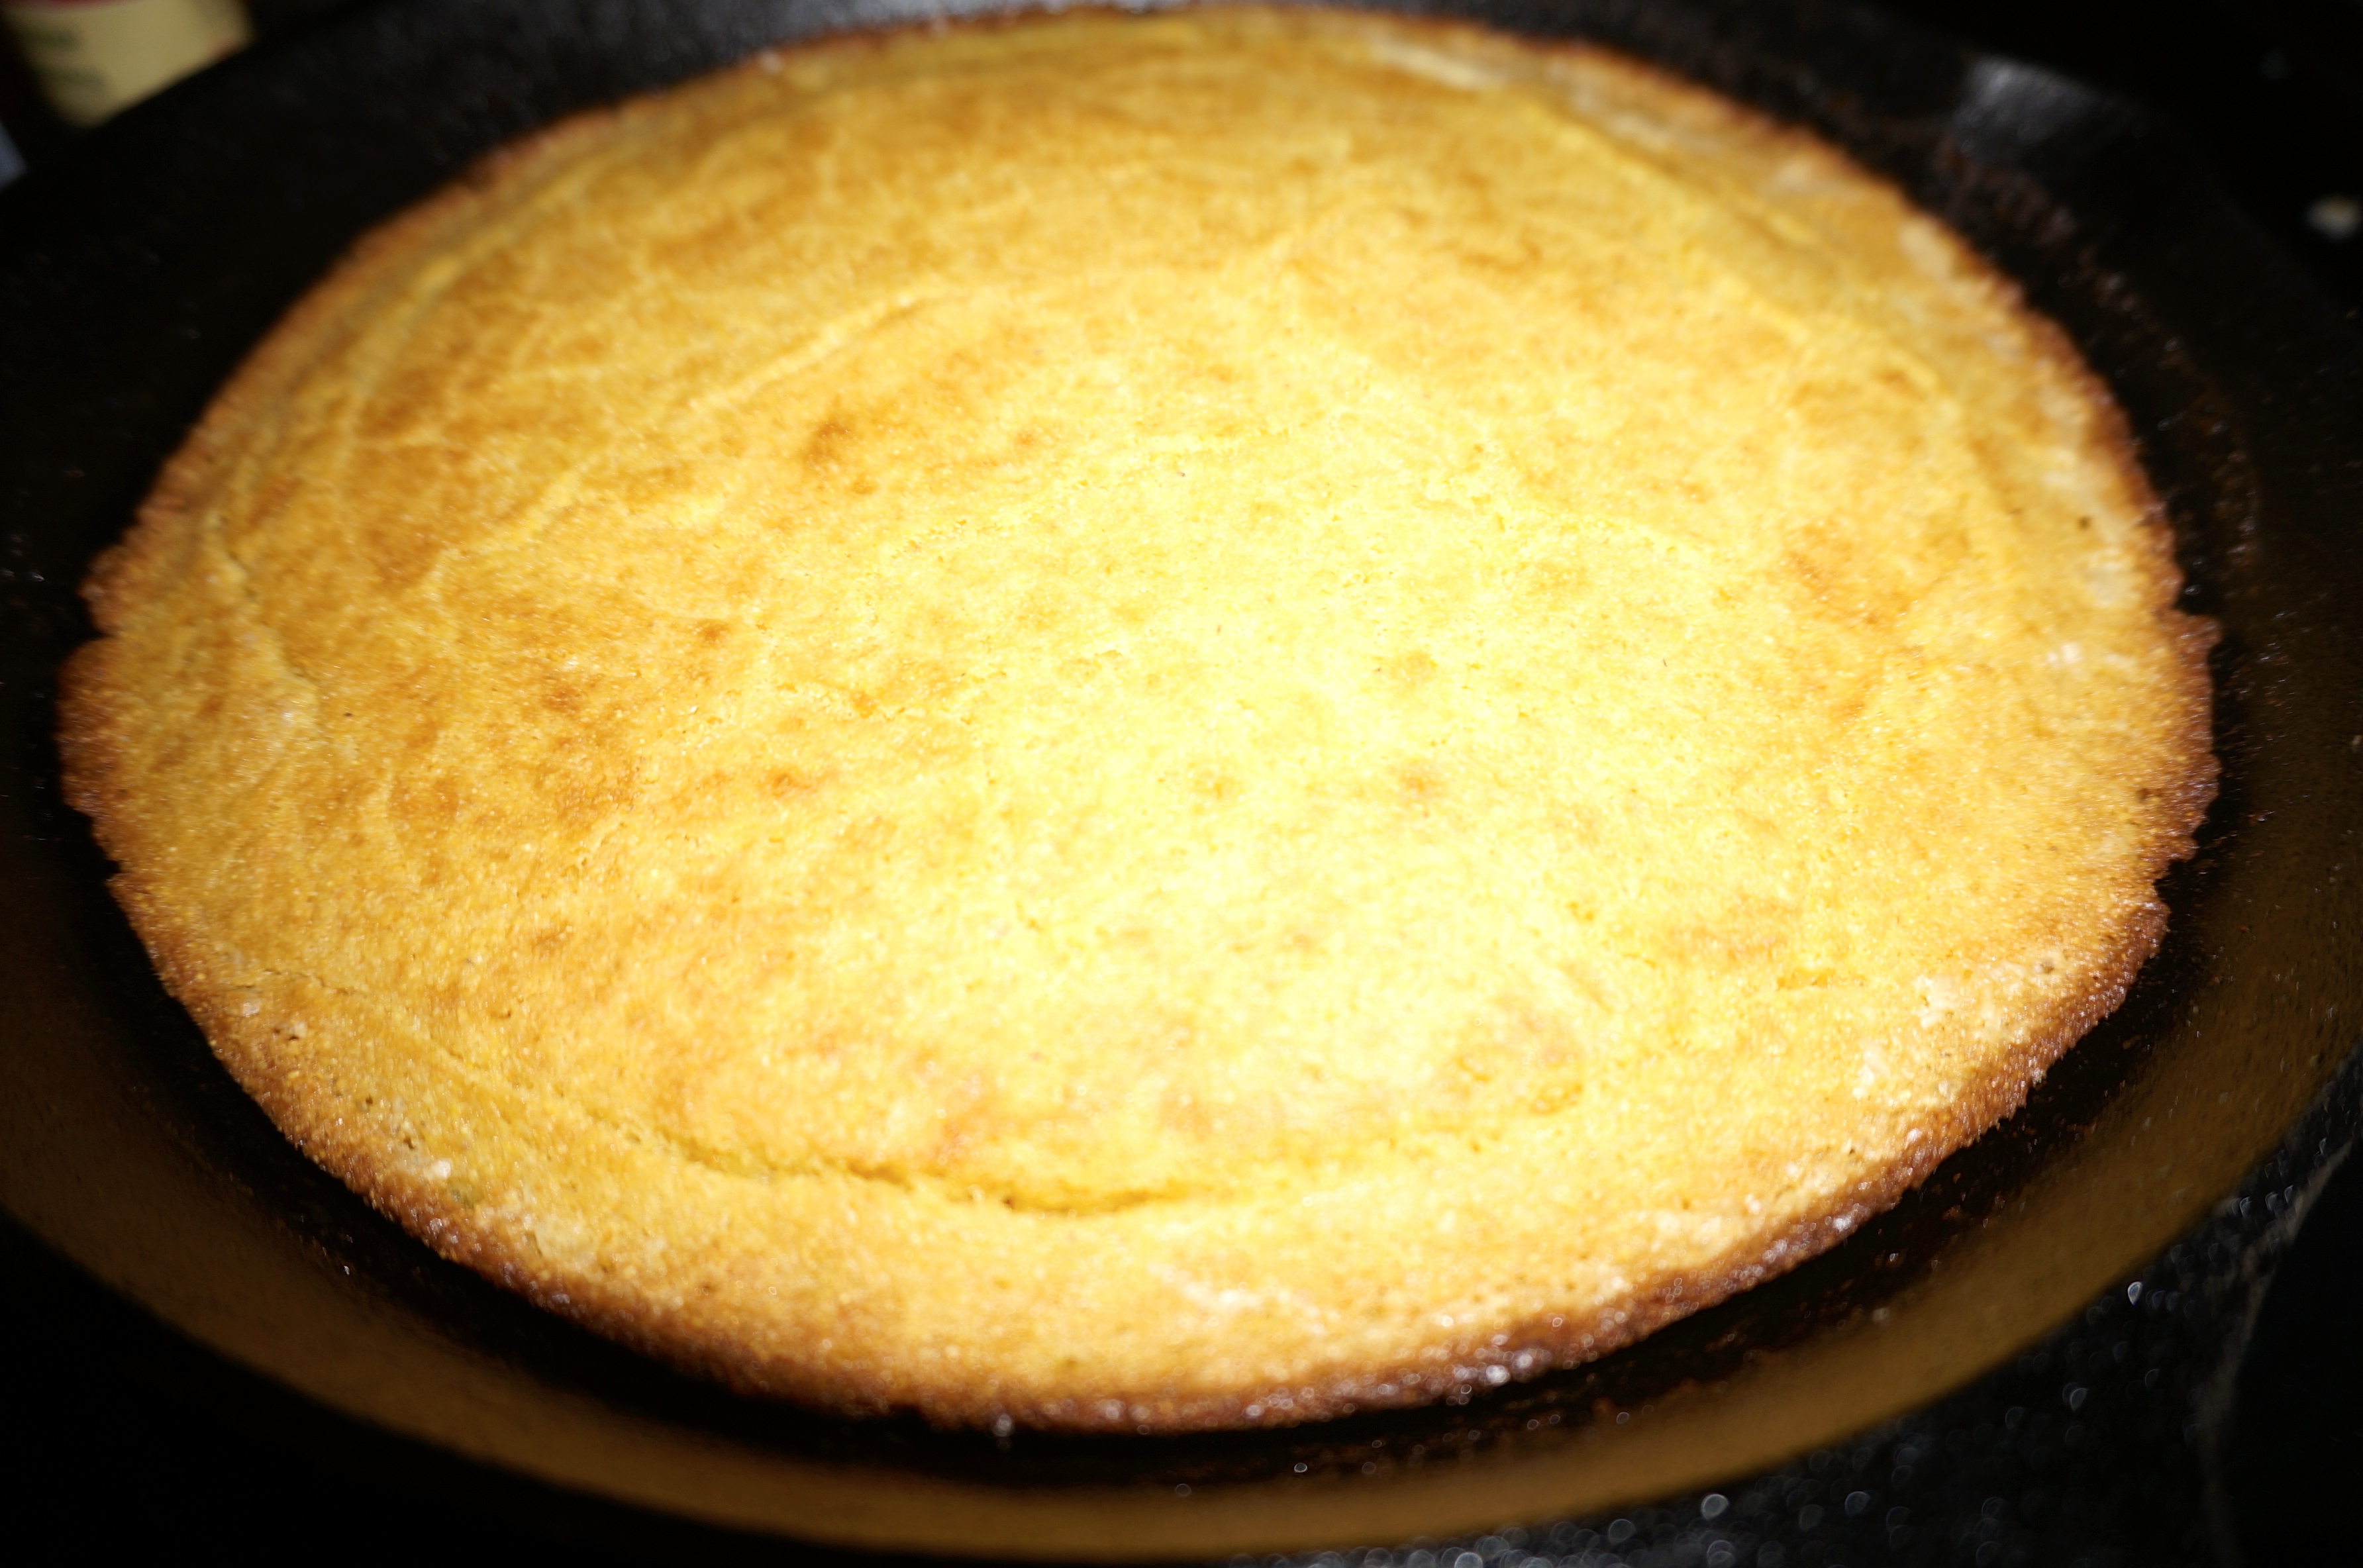
  • Pour the batter into the skillet and bake until golden (~15 minutes)
  • After removing the pan from the oven, let it rest for about 5 minutes
  • Cut and enjoy

This meal was pretty damn good. It was hearty and nostalgic, but on the downside it lacked any form of real vegetables whatsoever. The chili was pretty oily in the cooker, so before we mixed and served it, I spooned out most of the oil that had risen to the top. I also added a little bit of cornstarch to the chili to thicken it up. The cornbread turned out perfectly, but next time we might add some cheddar cheese to the mix, and maybe some jalapeños too.